TKD Design & Build Services
$50/hour.
Materials + Labor @$50/hour. First hour (used to design product) is refundable once final payment is received.
TKD Woodworking can assist in the design and build of a wood item or small piece of furniture, depending on the design. See a piece of furniture you like, but want a different wood, or have it scaled to fit a specific spot? Want a wood piece or a special box to store a treasured item? Contact TKD with your questions and we can setup a design session in your home.
Heirloom Side Table
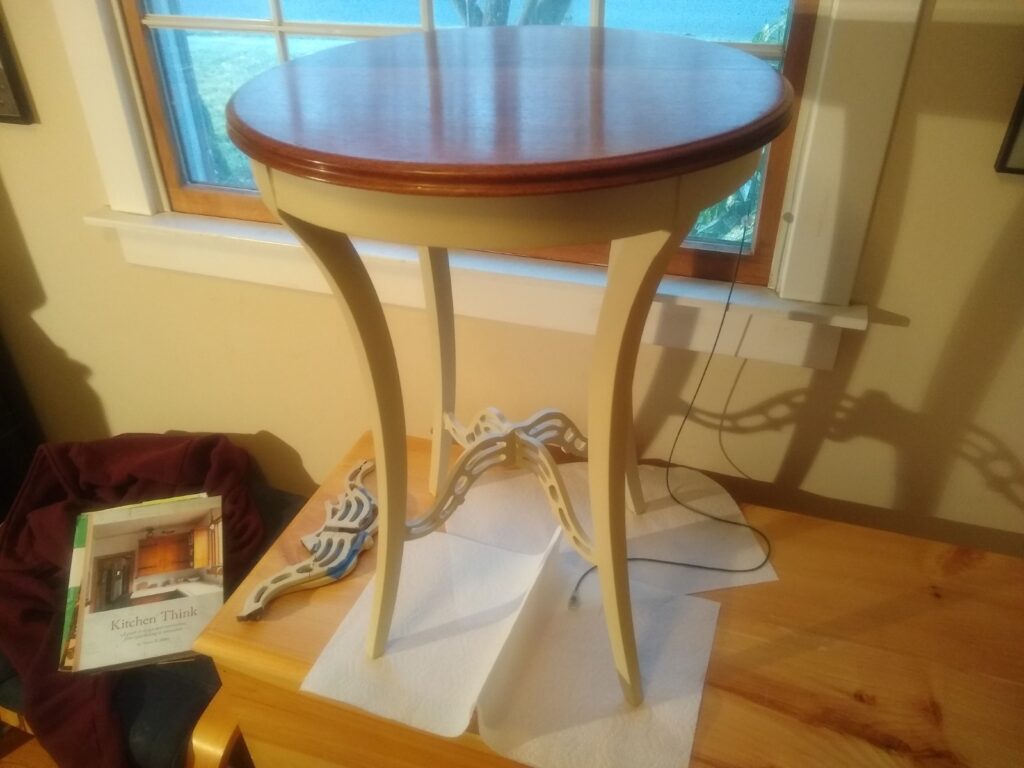
So I was asked at looking at repairing an heirloom table. I’ve done some furniture repairs in the past, but this will be a different one for me. The table was given by someone’s great-grandfather to his grandfather as an offering at his wedding, and the grandson has had it for 10+ years in the attic. Would like to see if it can be repaired.
My general process for this kind of work:
- Review piece and determine the extent of the damage and repairs necessary
- Determine sequence of disassembly for those parts which have to be taken apart
- Label parts so that you can disassemble and re-assemble correctly
- Disassemble, using clamps as spreaders and other tools to do so with the minimum of damage (you’ll have to repair whatever you do damage)
- Often white vinegar can be used to dissolve old glue
- Use scrapers, chisels and thin knifes to get out “junk” and get rid of glue, so you will be re-gluing with wood pieces
- Clear off all joints
- Determine pieces that have to be rebuilt/replaced. In this case one of the legs and the scrollwork underneath.
- Make replacement pieces, sand to size, and then test fit
- Make any appropriate joinery (in this case, some dowel joinery)
- Test fit and look for gaps
- Glue up and clamp up
- Apply finish
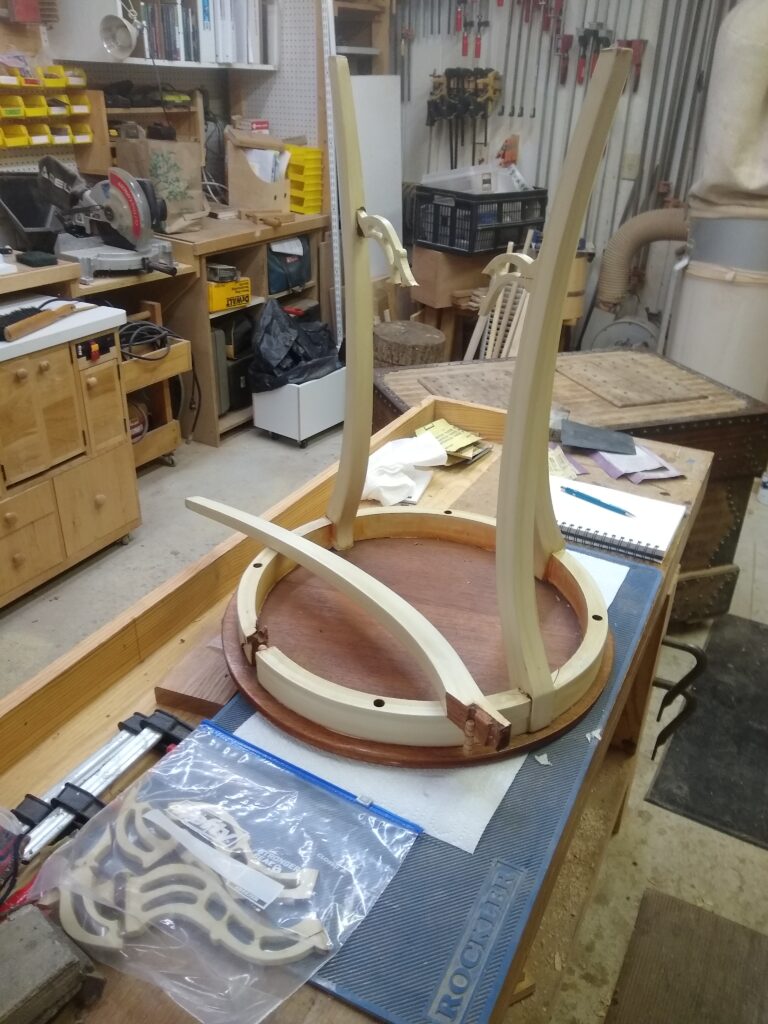
With the table disassembled, it is time to start repairing the legs and table stretchers, so that we can work on new joinery. Luckily, a lot of the pieces that partially split off were able to be separated and re-glued up. With good glue and a clean place to join, this should be stronger than the original wood.
For one of the leg pieces, the top of the joint was so badly broken up, that I chose to cut off the broken pieces and create a clean line to marry a new block of wood (Mahogany) to the existing pieces. Once that gets done, I’ll need to remove sufficient wood on the edges so that it matches the other wood.
I asked a friend of mine to do the scrollwork bottom section, as he is a lot better at that sort of detail work. It took him some time to copy, based on the badly damaged pieces we had available, but I think he did an excellent job. I also did all the repairs on the table sides and legs, including adding some wood repair pieces to the existing legs. From there, I milled/worked it down so the legs matched.
Right now, the legs are glued and I’m going to let them set for a day or two. Not going to be able to get the time for the next step till tomorrow night, but its on the way.
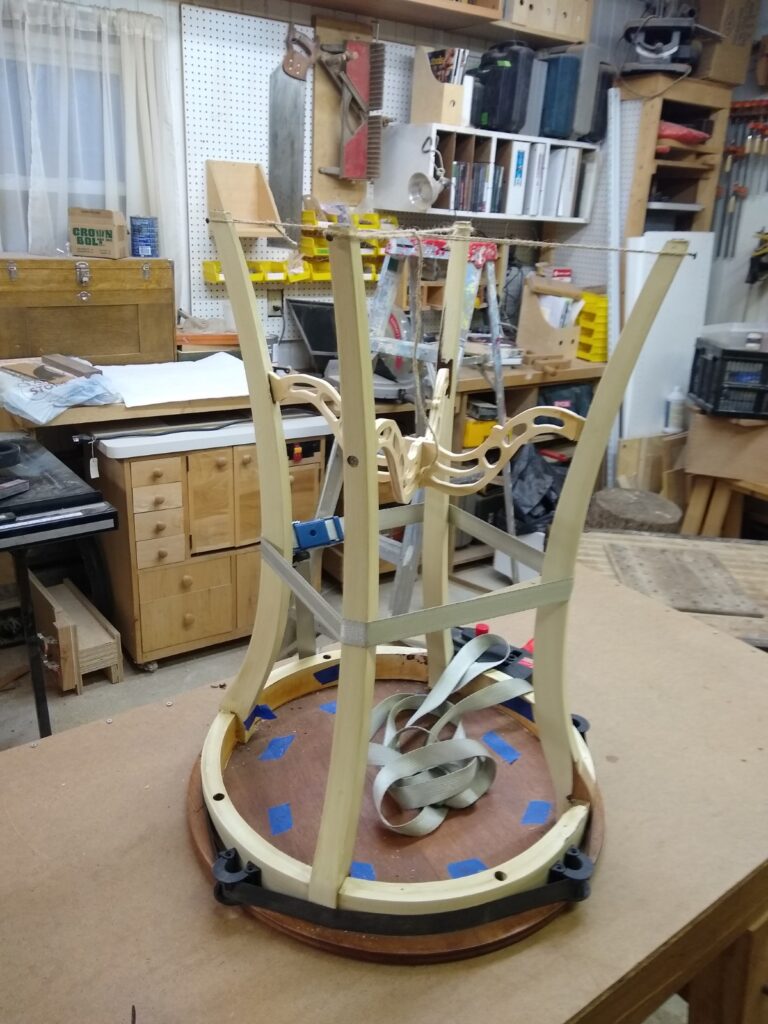
Entering the home stretch! I’ve managed to get the legs and lower scrollwork finished and rebuilt. The lower scrollwork is screwed in vs. the original dowel & glue. I also glued it, but I believe the screws are necessary to keep the legs together and keep the item from breaking apart.
The legs were first, and I used domino loose tenons and drilled mortises to attach them. A bit of a challenge getting the loose tenons to fit into the legs, I only had 1” width for the hole leg, and had to put tenons in on both sides. Used a band clamp to help secure it.
For the scrollwork, it was a challenge with the band clamp up top to get the legs to “pull in” enough to fit it in place, drill for the screws, and then glue & screw them together. I fell back on an old method, I used twine and a tightening slip knot (a taunt line hitch from my Boy Scout days) to pull the legs into alignment. Once that was done, the hope is that the glue & screws will enable it to hold up.
I’ve now used some epoxy to fill in some gaps/reinforce the regular glue, and some wood putting to fill in a few holes. The next step will be to sand all these down and then spot prime them, before painting the table.
With the table sanded, primed and painted, it was time to deliver it to the customer. His grandfather is still alive, so I’m hoping he gets the chance to see his table again!

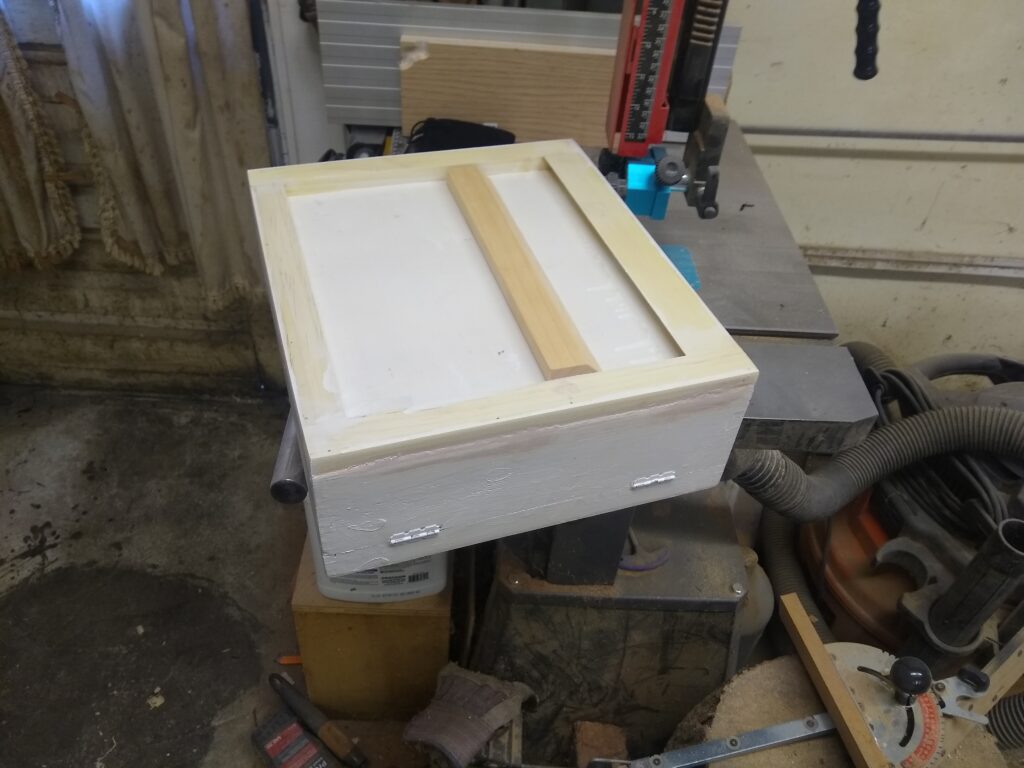
Small Box Bathroom Vanity
A customer had a need to add a small upper cabinet in their half-bath downstairs, and they had an heirloom box that they wanted to use for it. The problem was that the box bottom was too thin to support any sort of fasteners going into the wall and holding it up.
I was able to put a ½” wide set of trim around the back corners and use that to conceal a “French cleat” to hold the box up. A French cleat consists of two parts
- An angled strip that gets screwed into the wall (in this case, a ½” x 15” strip)
- An mating angled strip on the back of the cabinet
Once the first one is attached to the wall, the box is just lowered onto the mating strip, and that serves to hold the box up. You will often see some cabinetry use this same feature. It also makes it easy to remove the cabinet if needed (just lift it off the cleat).
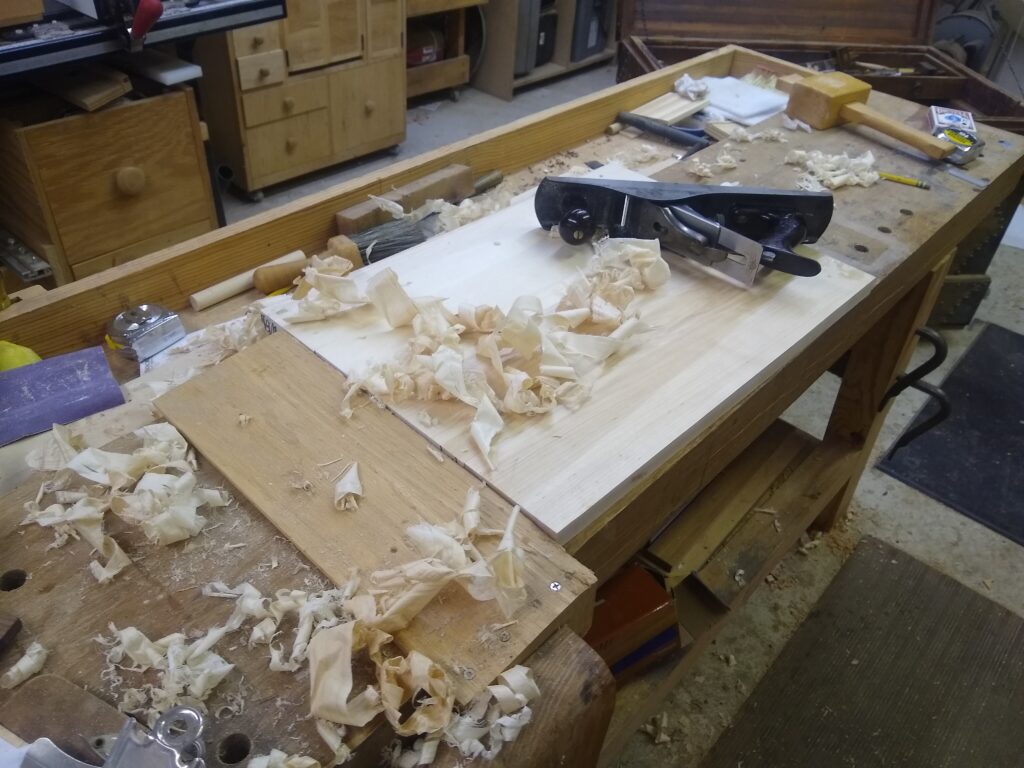
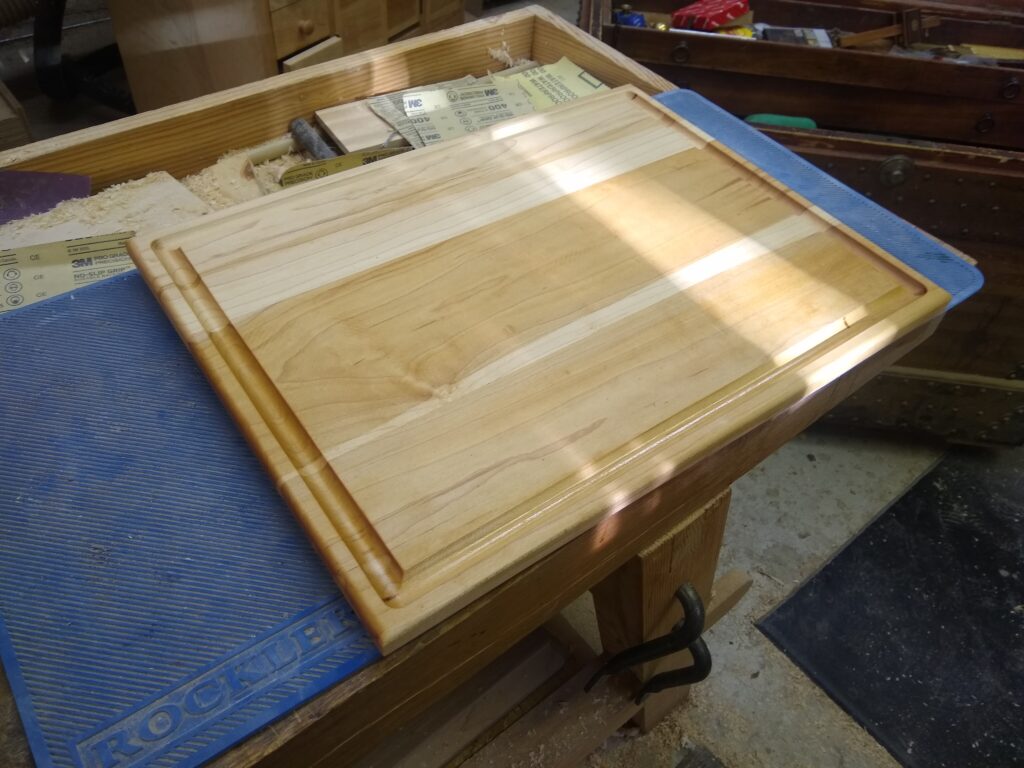
Custom Cutting Board
A customer wanted a special size cutting board that would fit their cabinet top and would be used for cutting fruits & vegetables. Their requirements were:
- 15” x 20”
- Not too thick (1” to 1-1/4”)
- Feet on bottom to keep it from slipping
- Juice groove around the outside
- Just Maple. No multiple woods
Was able to joint, plane and glue up the board, but since I don’t have a machine planer or sander large enough to handle a 15” wide item, I had to do the planning down by hand. Time to take out the trusty #5 Jack plane I inherited from my grandfather!
Got it milled down, sanded up, and delivered to the customer on time. They have been enjoying it for the holidays!
Table Top
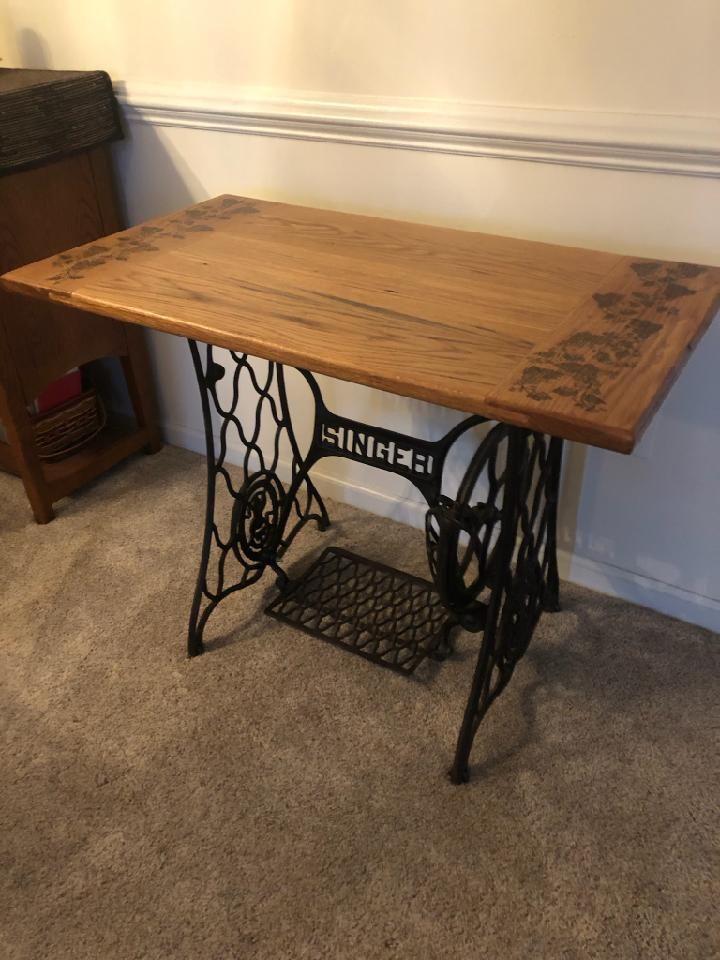
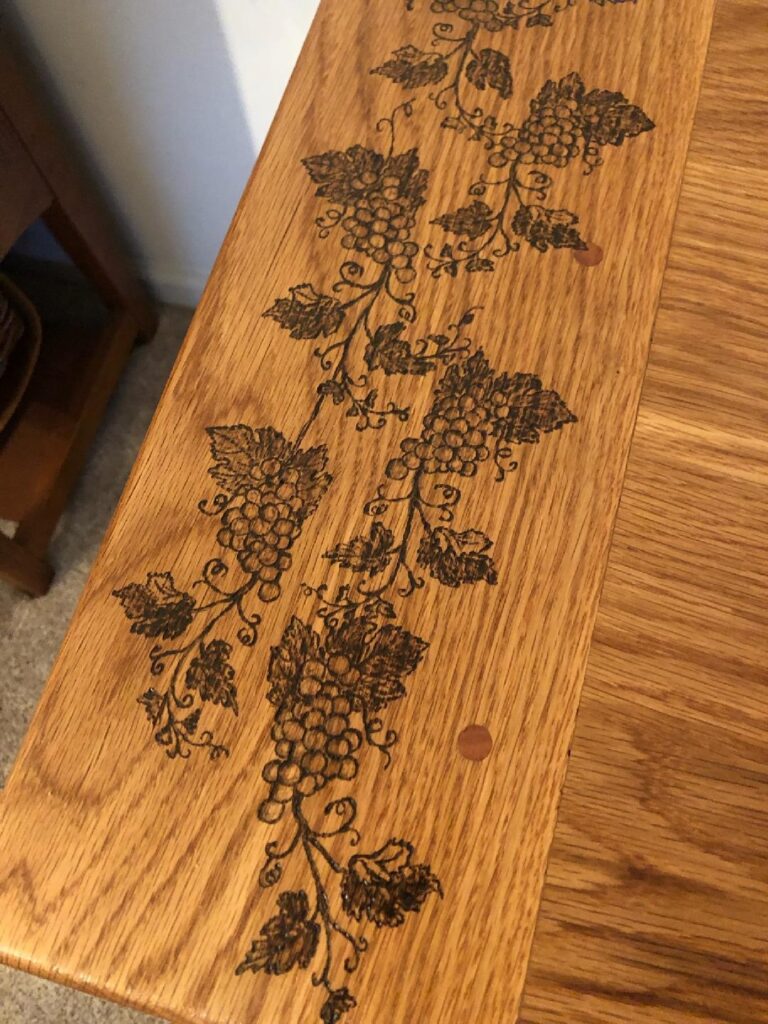
Customer, Controlled Burn Designs (Controlledburndesigns.com, 908-403-5656) is a business that does hand scribing and burning of pictures on wood products. The owner, Kathy, had an old sewing machine platform with a treadle at the bottom, and she wanted to put a tabletop on it and use it as a side table or wine table for serving.
Requirements included specific dimensions (52” long, 20” wide, 1” thick), the type of wood (quarter sawn white oak, which doesn’t move as much), and a request for breadboard ends. Breadboard ends are lengths of wood that run perpendicular to the slats of the table. These help prevent the wood from warping and keeps the table alignment in place.
Project consisted of milling and joining the wood slats together, milling a tongue on the ends, and then milling a groove in the breadboard ends for the tongues to fit into. The final step was to “drawbore” pegs into the breadboard ends. This process consists of slightly offsetting the holes in the tongues from the ones in the breadboards. When you drive the pegs in, the offset helps “pull” the breadboard tight against the table ends.
No finish – the customer wanted to carve on the table and then finish it.
Overall, it came out very well, and she was very happy with the results.
End Table / Laundry Hamper
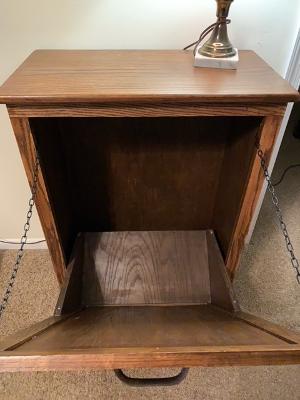
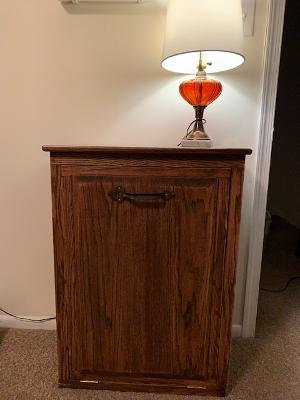
The customer was looking for an end table in their bedroom that could also serve as a laundry hamper. They had a specific size of hamper that needed to fit in it, with a specific table height and depth that was needed for the bed.
I had to figure out how to make the hardware work for a tilt-out hamper with those dimensions, build it to match some of the existing furniture, and stain the wood to match the darker wood furniture in place.
The most challenging part was trying to match the stain color with the existing wood. Overall, she was pleased with the result and continues to use it to this day.
Ribbon Rack
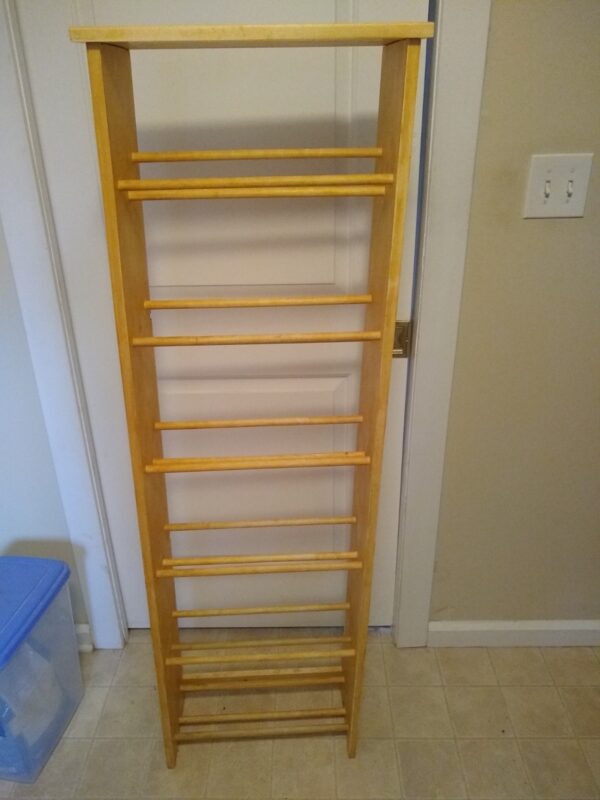
Customer had a craft room where they made decorative wreaths with ribbons. They needed some sort of rack to store their numerous ribbon types on, where they could view the ribbon and access each roll individually. They had tried stacking them and using Tupperware boxes, but they really wanted something to be able to view every ribbon color they had. She also didn’t want to spend an excessive amount of money. Since it was a craft room, she didn’t need expensive wood or finish.
So I did some measuring to determine how to support the rolls on their sides, using a series of dowels. We located a space in her home where she wanted it, so I built it to those exact dimensions for width, height and depth.
I used pine side boards and dowels to complete, and finished it with several coats of shellac. I added nailer/screw strips on the back so that if they wanted to hang it or secure it to the wall, they had something to do.
It was a fun build, she was pleased, and I was able to turn it around within a month of her approaching me.
Custom Cutting Board
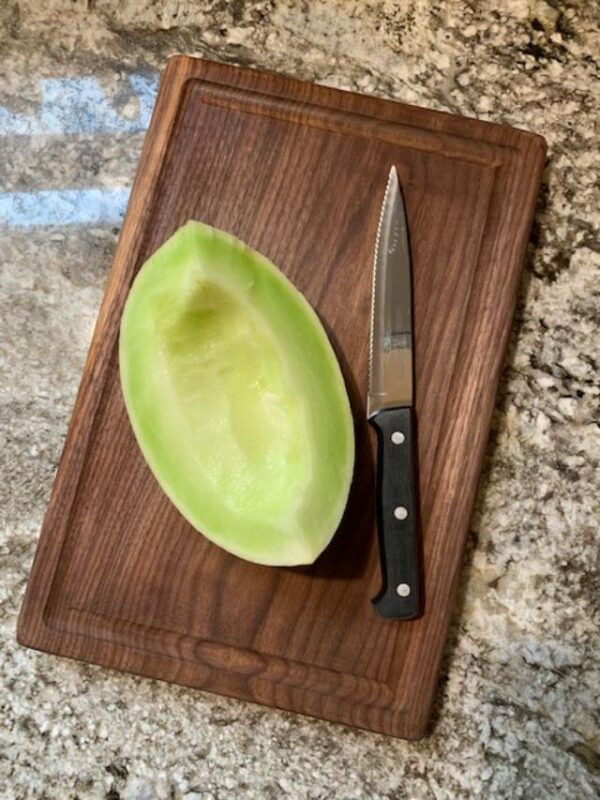
Many times a customer wants a specific dimension, style and/or wood type for a cutting board. In this case, the customer wanted a specific wood type (Walnut) with a “juice groove” cut around the outside. They also wanted a specific dimension, to fit where they wanted to place it.
I was able to located some wood that I thought had a lot of “character” and I made two of them, so the customer could decide which one they wanted to purchase. The juice groove is typically ½” wide by ¼” deep, and is ½ to ¾” from the edge.
Once done, I coated the cutting board with three coats of cutting board oil, which brought out the color and character of the wood. Very beautiful, and I was able to deliver this to the customer within a week.