
Making Marking Gauges from scraps
I’ve been considering doing some teaching, either via video or at the local technical school. Woodworking for ages 14+. I wanted to do something which shows, with some basic tools and without a dedicated woodshop space, you could produce items and some additional woodworking tools to use. Not sure when this will come to fruition, but its an idea.
I wanted the students to be able to build some of the tools and jigs they would use, and one of those would be a marking gauge. Professional marking gauges can run from $20 – $100, depending on how fancy you want to get. However, with some offcuts of wood, you can build yourself a perfectly fine gauge that will last.
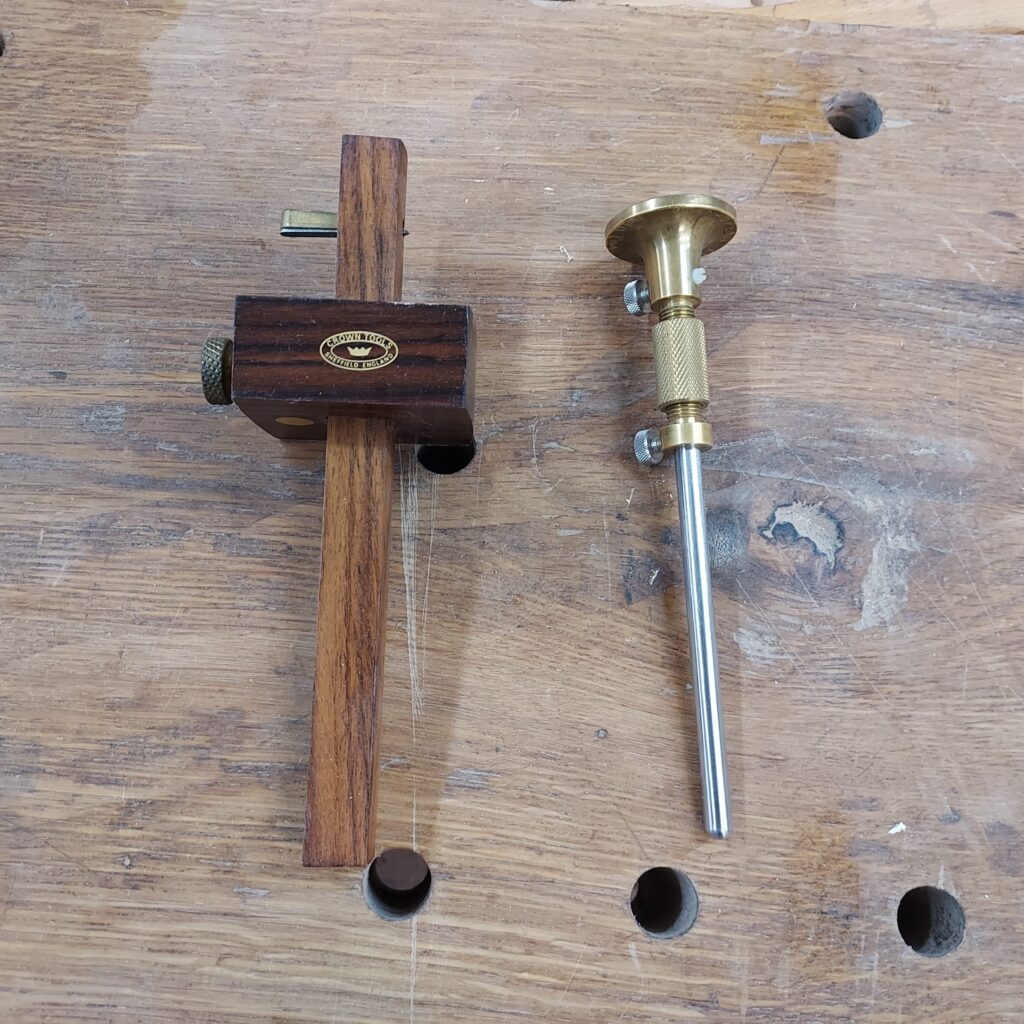
I started off looking at the wide variety of gauges that folks show you how to build, either online or in books. One that I liked was a simple one out of fine woodworking. It is just three pieces, all out of wood. They use a pricey knife to make it a cutting gauge, but I thought I could do the same thing, but with a sharpened nail for a pin gauge.
Here is the article, pieces and the wedge they use to make it work. The fence and beam are ½” thick, while the wedge is ¼”. Once I built it, It operated very well.
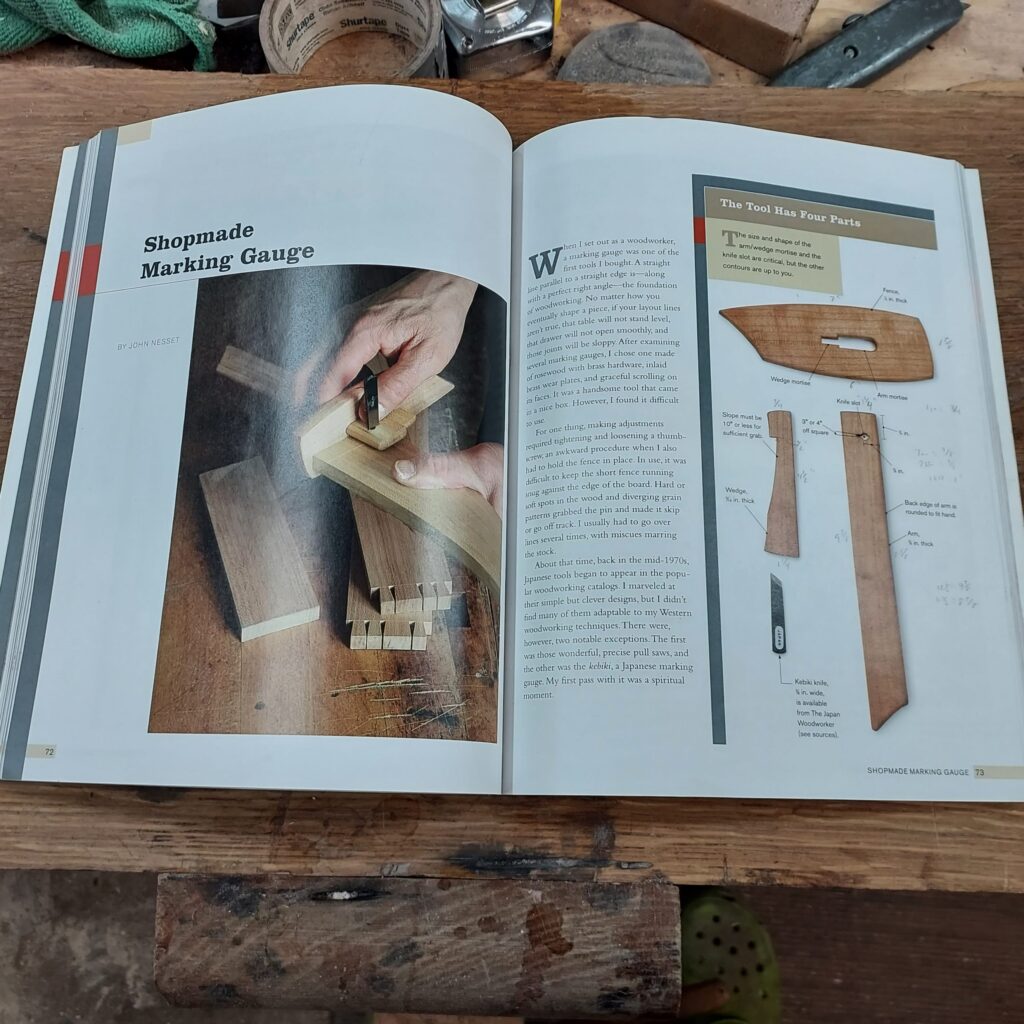
However, it seemed like a lot of extra steps and “fiddling” were needed to make this work. In order to make it easier to work with and to match some beginner tools, I chose to make the fence and beam out of ¾” cherry, and the wedge would be ½”. That way it would be a little sturdier.
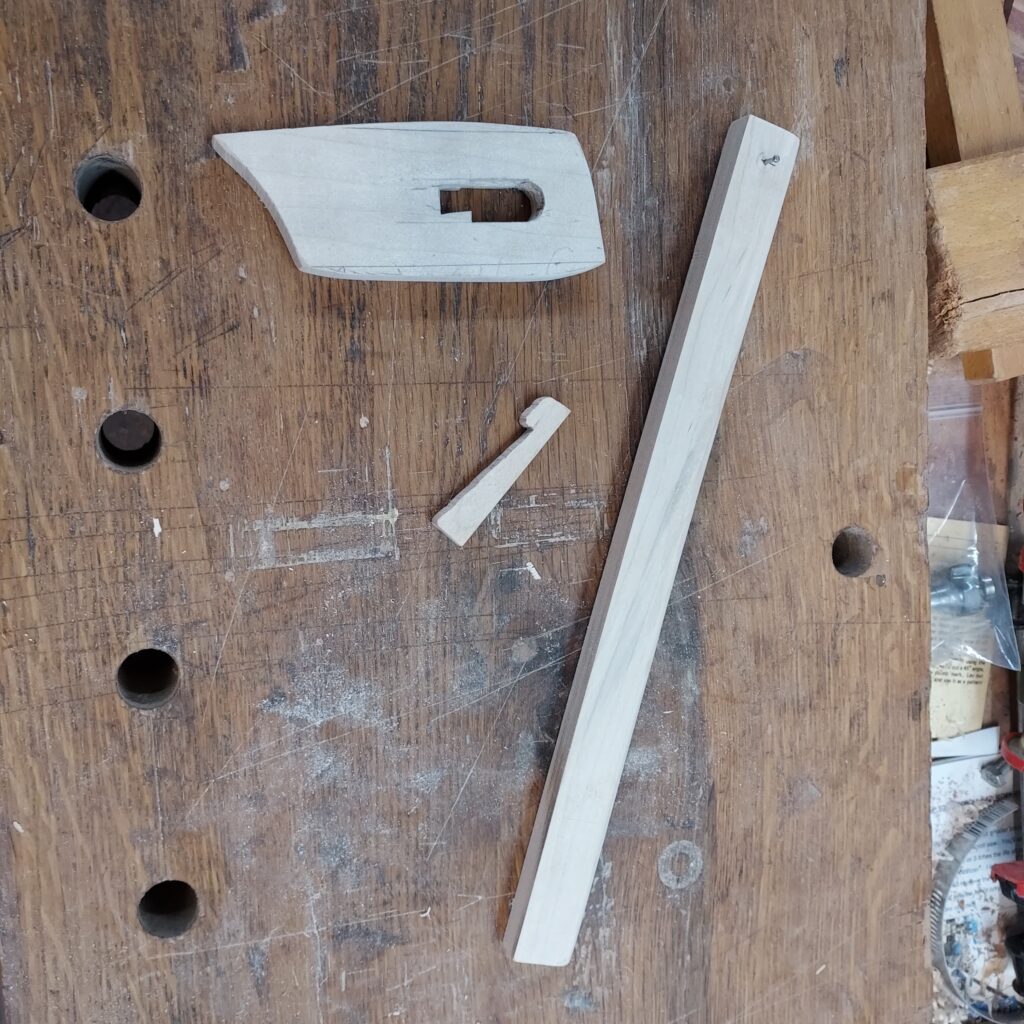
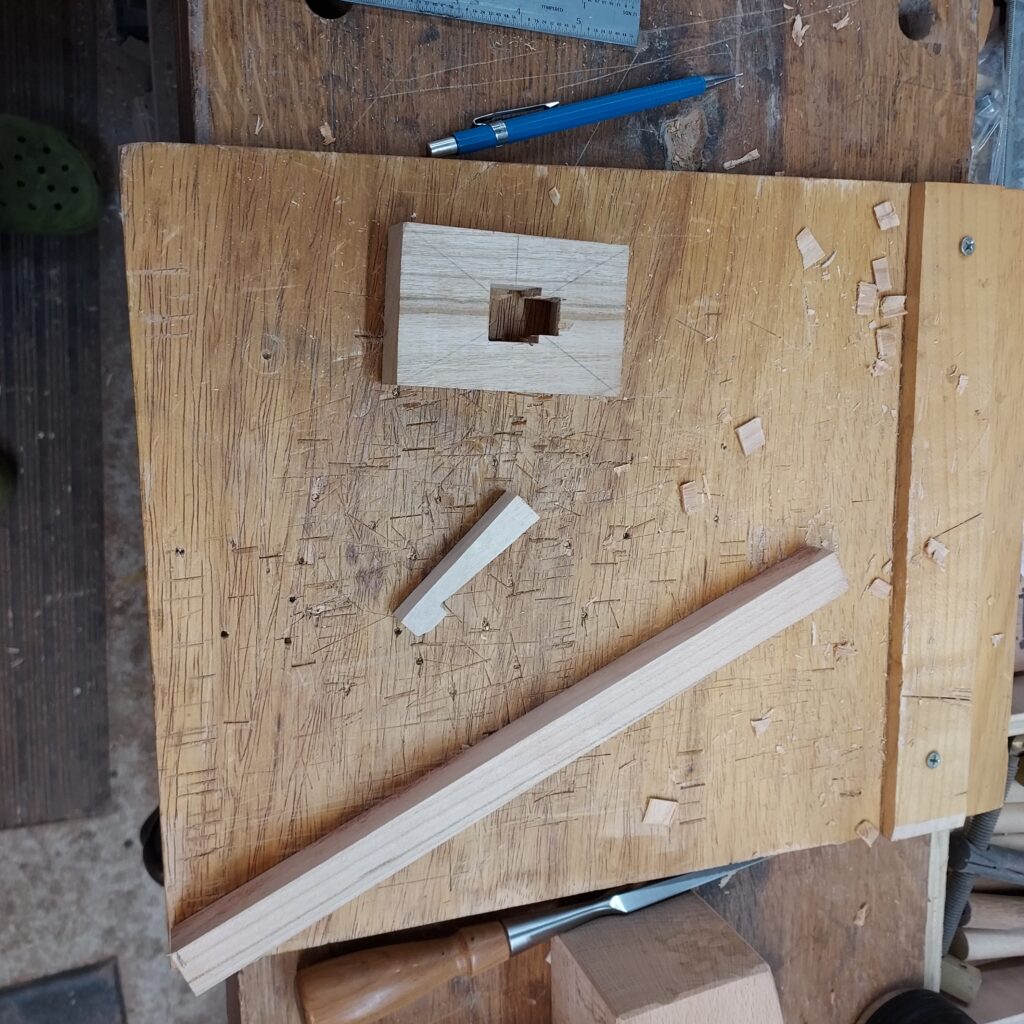
- Mill the wood to size (Fence is 3-1/2” x 2-1/2” x ¾”, beam is ¾” square x 12” long. Wedge piece is ½” thick, starts at 4” long x 1” high (then its cut down),
- Use patterns to lay out wedge, and then use coping saw to cut wedge to size
- Layout center point on fence, and mortise hole for arm. Scribe layout lines with knife
- Use brace to drill 5/8” hole in center of mortise to clear out bulk of waste
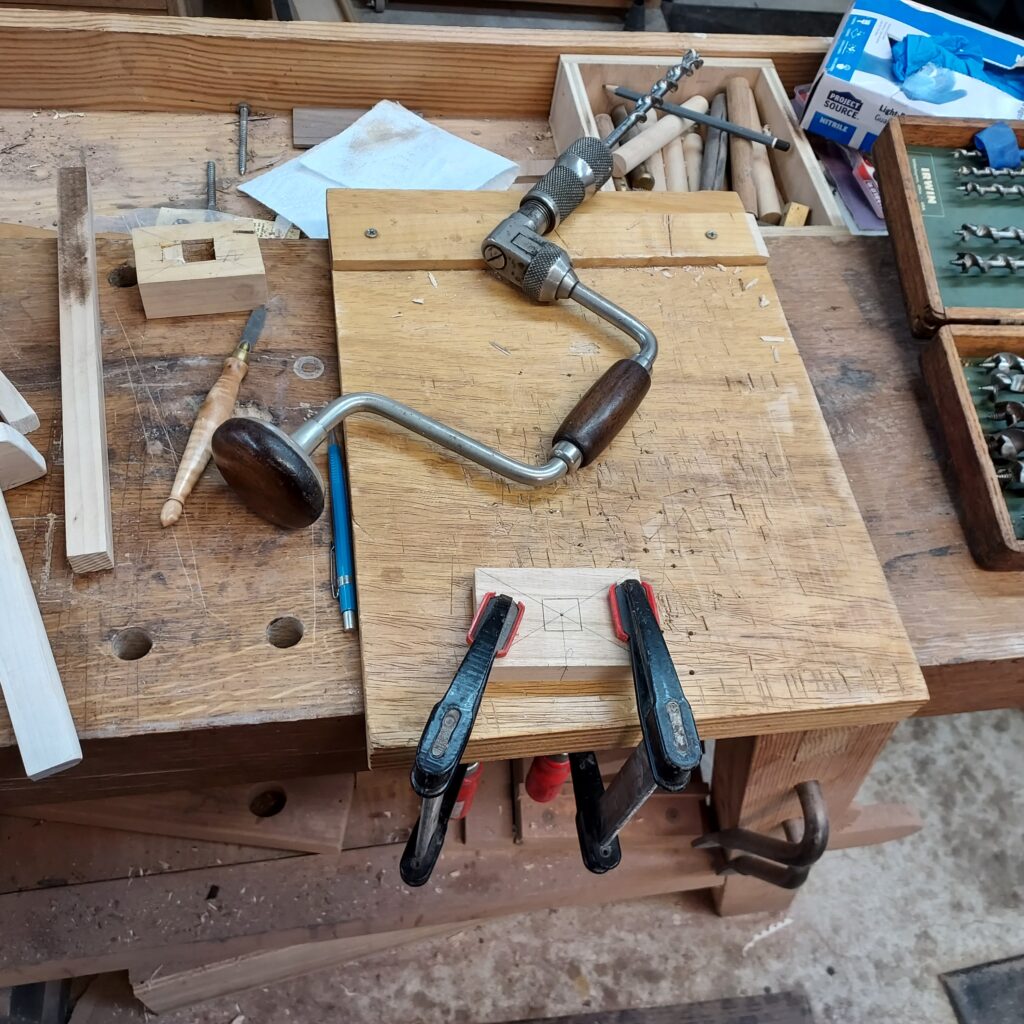
- Use chisels to clean up mortise hole. Test with arm until it runs smoothly through mortise.
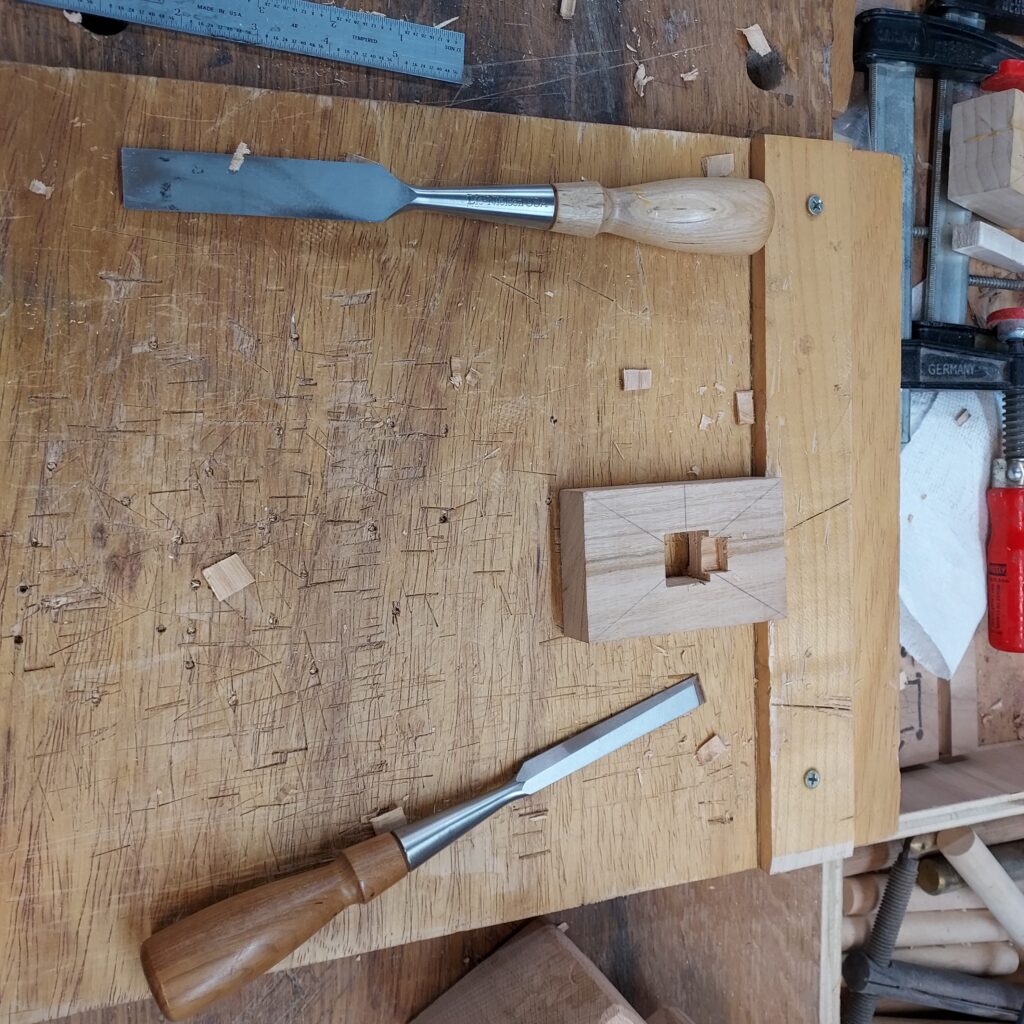
- Cut the wedge mortise with an angle of 5-10 degrees. Cut wedge first, then use it to determine the angle of the mortise wall. Use pencil and paper to determine wedge end points on each side of fence
- Give edges of mortise a slight bevel to protect them
- Use block plane and sandpaper to smooth it
- Saw and shape the ends of the fence and use a block plane to round its back edge.
- Add the pin. Drill a small hole, then use drill to seat the 6d nail, 1-2/” long in hole
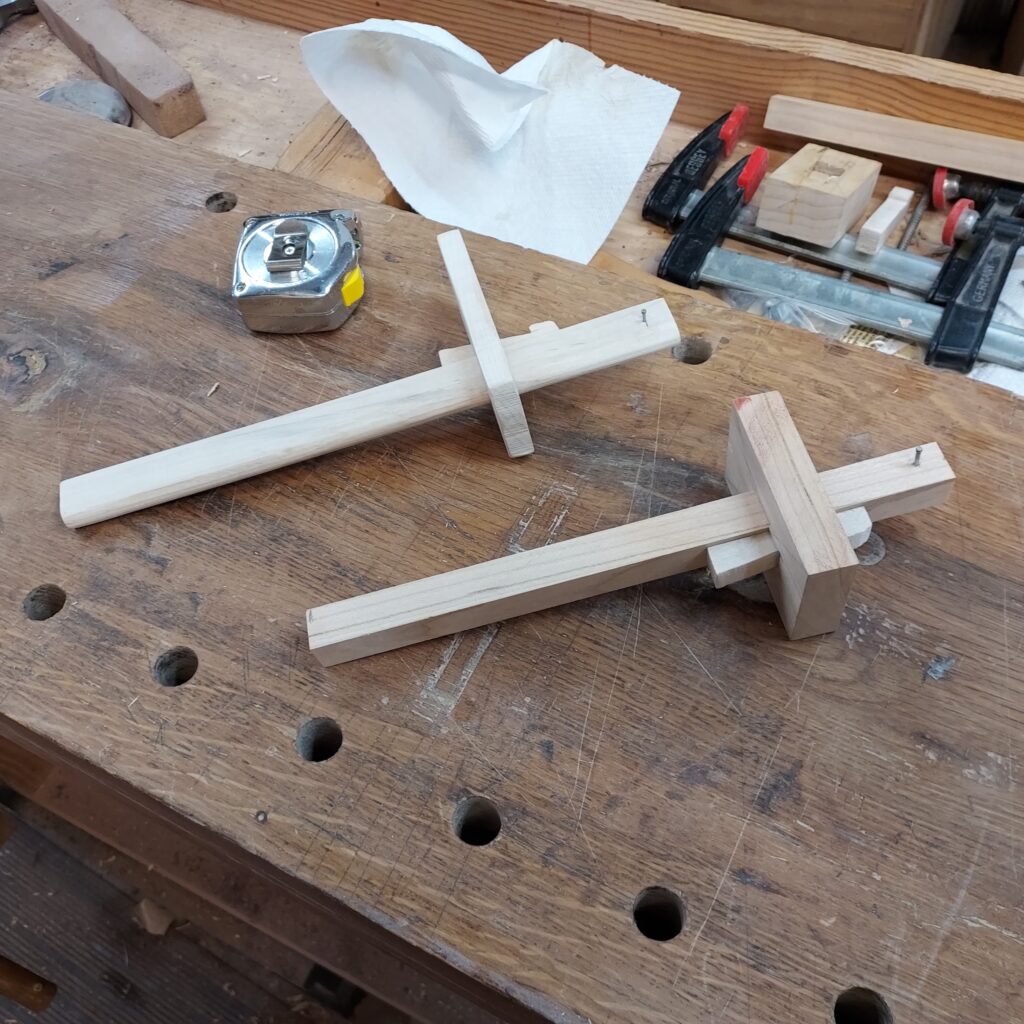
The two side-by-side show the similarities and the differences. The locking wedge works pretty well. You need to use a file and sandpaper to sharpen the pin a bit. Then it works well.
Kevin